
How to configure Label Printing at Sign In
The Gold Editions of HandicapMaster allow labels to be printed as Players sign in.
Label printing needs to be enabled in Player Entry and the label printer must be configured in Windows.
Contents
- Enable Label Printing in HandicapMaster
- Configure the printing on the Label
- Configure the Printer in Windows
- Reset the choice of Player Entry profile (and Printer) for a computer
Enable Label Printing in HandicapMaster
Label printing is enabled and configured through the Player Entry configuration Wizard. To start this:
On the left hand task pane, select Competitions place.
On the right hand pane, double-click Settings Profiles.
Do one of the following:
- Select a Profile and press ENTER Key, or
- Double-click the Profile entry in the list
- To add a new Profile, click Create a new Profile in the Player Entry Tasks list (or press the INSERT key).
There are many options for configuration so we recommend you click the Help button for detailed assistance with the
Player Entry Configuration wizard.
On the Services page ...
- Ensure Sign-in is selected.
On the Print Score Cards or Labels page ...
- Tick Print Score Cards or Labels as players sign-in box.
- Choose whether to print labels for Competitions and/or General Play scores.
- Click Position Data on Scorecards button to configure the printing on the label.
If you have just added a label printer to the Computer where Player Entry is running you may need to configure the Printer in Windows before you can successfully print labels.
Configure the printing on the Label
You may lay out the contents of the labels as you like.
To do this,
- Select an item in the drop-down box and then tick INCLUDE to add this to the label. You can include various different items including Handicap Index, Course Handicap and Playing handicap.
- Position that item on the label. To do this, either....
- Enter a precise position in the Across and Down boxes, or
- Use the four red Arrow buttons to move the item, or
- Drag and Drop the highlighted item on the display.
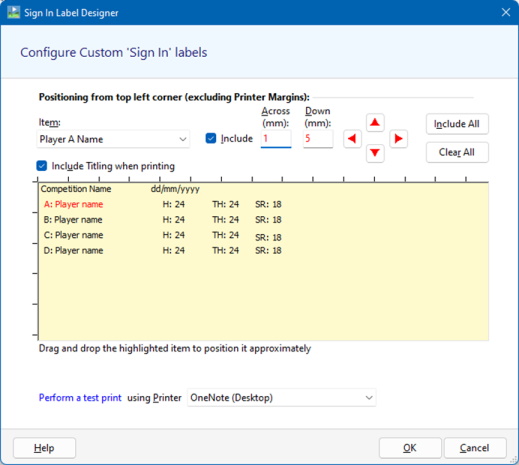
The grid lines around the display represent 1cm intervals.
You may click the blue link Print a test print to print the current design at any time.
Configure Printer in Windows
This section offer examples of how to configure a Dymo label printer on Windows 7 and higher.
Other label Printers are available and the configuration steps required in Windows should be similar.
On the Player Entry computer that the printer is connected to go to the Windows Control Panel. An easy way to do this is to press the Windows key on the keyboard then start to type 'control'.
You should see the 'Control Panel' listed and highlighted, click on it or press ENTER.
At the top right on the 'View by:' select Small icons.
Click Devices and Printers. Locate the label printer and click once to highlight and right click and select Printing Preferences.
Change the Orientation if required.
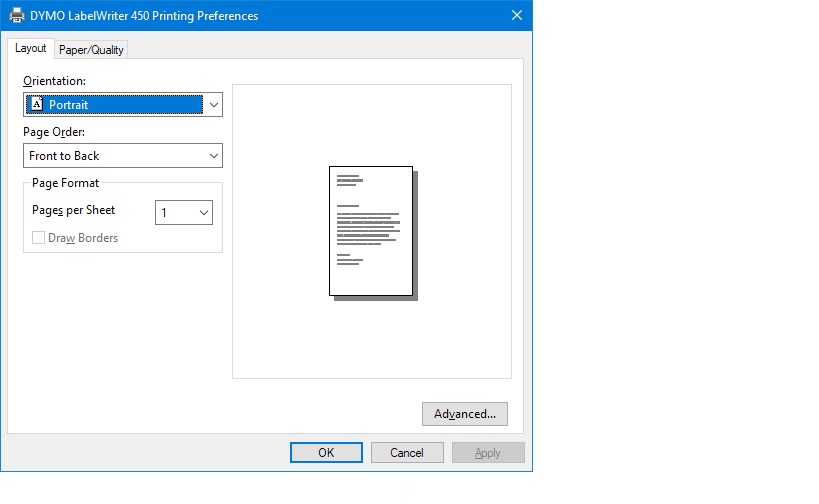
Click Advanced button.
Click the 'Paper Size' box and select the appropriate label size. You may need to find the correct size code from the box the labels were supplier in.
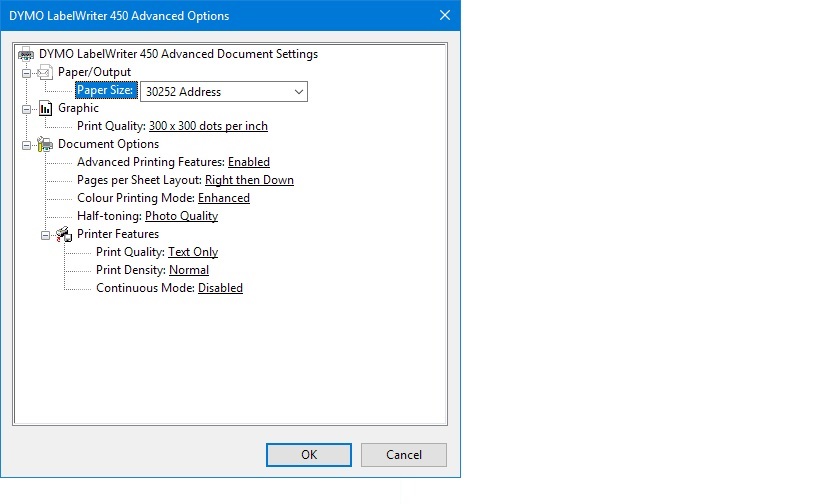
Click OK until all the printer preference windows are closed and you are back at the Windows Control Panel.
Reset the choice of Player Entry profile (and Printer) for a computer
If you have more than one Player Entry profile configured, you will be prompted to choose the profile to use when you start Player Entry.
At this time, you may choose to Always use this choice on this computer.
If the label printing at sign in option has been selected in the Player Entry Profile then the choice of printer
will also be displayed and you may choose to Always use this choice on this computer.
At a later date, it is possible to reset this selection of profile so that an alternative profile
and if appropriate an alternative label printer can be used on that computer.
To clear the automatic choice of Player Entry profile (and equipment) for a specific computer, do the following:
- On the left hand task pane, select Competitions place.
- On the right hand pane, double-click Assignments.
- Do one of the following:
- Select the applicable computer and press DELETE Key, or
- Click Clear an Assignment in the Assignment Tasks.
When next starting Player Entry on the applicable computer, you will be able to choose which profile to use.